Complete Guide to Smoothing Retouch at Home: Achieve Perfectly Straight Hair Without Damage

Having straight, soft, and manageable hair is a dream for many. If you’ve previously had smoothing and your new hair is starting to grow, it’s time for a smoothing retouch. This process is crucial for maintaining a uniformly straight and beautiful hair appearance.
However, it’s important to remember that a smoothing retouch is not a process to be taken lightly. The meeting point between new hair that hasn’t been smoothed and old, processed hair is the most sensitive zone. Even a slight mistake in cream application or timing can lead to fatal consequences, such as hair breakage or even permanent damage. Therefore, let’s delve into the steps thoroughly so you can achieve perfect results.
We at SalwaSalon.com have compiled this practical and in-depth guide so you can perform a smoothing retouch safely and effectively, even at home. Follow each step carefully!
Initial Preparation: The Key to a Successful Smoothing Retouch
Before starting the core process, thorough preparation is half the battle. Don’t rush; make sure all your needs are met.
- Analyze Hair and Scalp Condition
- Check New Hair: Ensure new hair growth is at least 3-5 cm. If too short, the cream will more easily touch the scalp, risking irritation.
- Old Hair Condition: Evaluate the health of the already smoothed hair. If dry or damaged, provide intensive treatment (mask or deep conditioner) a few days beforehand.
- Scalp: Avoid performing a retouch if your scalp is irritated, wounded, or has severe dandruff. Let it heal first.
- Prepare the Right Tools and ProductsChoosing quality products and tools is the best investment for your hair health. Here’s the list:
- Quality Smoothing Retouch Cream (Step 1 & Step 2): Choose a trusted brand specifically designed for retouch or your hair type. Look for one that contains a protective formula.
- Non-Metallic Bowl and Application Brush: Avoid metal as it can react with chemicals.
- Tail Comb and Hair Clips: For neatly sectioning hair.
- Protective Gloves: Mandatory to protect hands from chemicals.
- Old Towel or Protective Cape: To protect clothing.
- Timer or Stopwatch: Essential for monitoring processing time.
- Professional Hair Straightener (Ceramic/Tourmaline): With temperature control.
- Hair Dryer: With adjustable heat settings.
- Hair Mask or Hair Vitamin: For post-smoothing care.
Tip from SalwaSalon.com: We recommend smoothing products that contain keratin or protein to minimize damage. You can find our product recommendations via our affiliate links.
Accurate Smoothing Retouch Application Steps
This is the core of the retouch process. Patience and precision are key.
- Step 1: Sectioning Hair with Precision
- Clean and Dry Hair: Ensure hair is clean (shampooed 1-2 days prior without conditioner) and completely dry. Avoid using hairspray or other styling products.
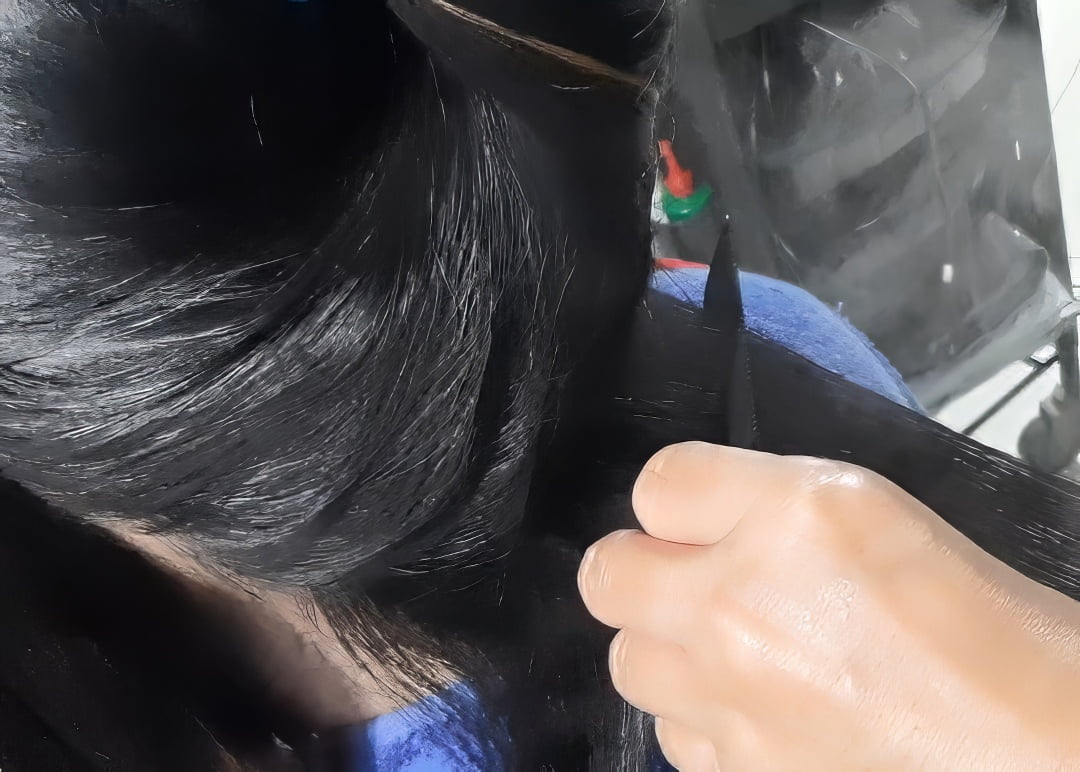
- Divide Hair into 4 Main Sections: Use a tail comb to section hair from ear to ear and from forehead to nape. Clip each section.
- Take Small Sections: Starting from the lower back, take hair sections 1-2 cm thick. This ensures even cream application.
- Step 2: Applying Step 1 Cream (Straightener)This is the most crucial part. Focus on the new hair!
- Wear Gloves: Always protect your hands.
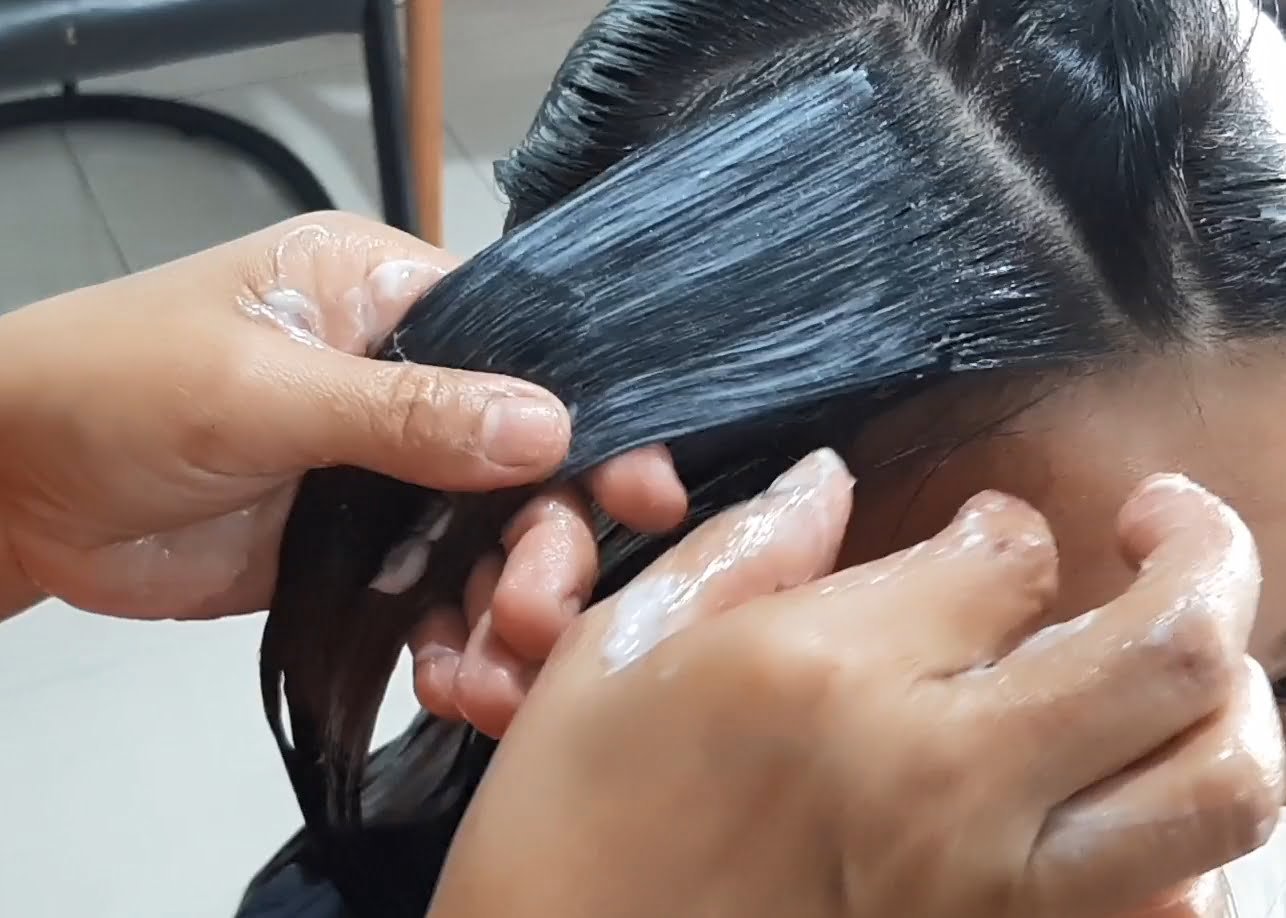
- Apply Cream Only to New Hair: Using the application brush, carefully apply Step 1 cream only to the newly grown hair area (about 3-5 cm from the roots). Ensure it doesn’t touch the scalp and avoid as much as possible touching the previously smoothed hair.
- Even Out with Fingers: After applying, spread the cream evenly with gloved fingers towards the ends of the new hair. Do not pull the hair too tightly.
- Work Systematically: Continue to the next hair sections until all new hair is covered with cream.
- Step 3: Processing and Hair Elasticity Test
- Adhere to Processing Time: Each product has a different processing time, usually 15-45 minutes. Follow the instructions on the packaging. Set a timer!
- Perform Elasticity Test: After 15-20 minutes, take a strand of hair from an area where the cream has been applied. Gently pull it. If the hair becomes stretchy like rubber and doesn’t return to its original shape, it indicates the hair is sufficiently processed. If it’s still stiff, wait a few more minutes and repeat the test.
- Do Not Over-Process: This can cause severe damage. If the hair is too stretchy or feels mushy, rinse immediately.
- Step 4: Rinse Hair Thoroughly
- Use Running Water: Rinse hair under running water (normal temperature) until it is completely clean of Step 1 cream residue. Ensure no residue is left behind. This process can take 5-10 minutes.
- Avoid Rubbing Scalp Too Vigorously: Just gently massage while rinsing.
- Step 5: Drying and Straightening
- Dry Hair 80-90%: Use a towel to absorb excess water, then dry with a hairdryer until almost completely dry. Hair should feel damp, not soaking wet.
- Comb and Straighten Thin Sections: Divide hair back into small sections. Slowly and thinly straighten hair from root to tip. Use a temperature appropriate for your hair condition (usually 180-200°C for normal hair, lower for fine/damaged hair). Ensure each section is straightened evenly.
- Step 6: Applying Step 2 Cream (Neutralizer)Neutralizer works to lock the new hair structure to keep it straight.
- Apply Evenly: Apply Step 2 cream to all parts of the hair, from root to tip, including previously smoothed hair. Ensure all hair is covered.
- Leave On According to Product Time: Usually 10-20 minutes. Follow the instructions on the packaging.
- Rinse Thoroughly: After the processing time is complete, rinse hair until perfectly clean with running water. You can shampoo and condition using products specifically for smoothed hair.
Post-Smoothing Retouch Care for Long-Lasting Results
The retouch process is not complete without subsequent care. This is essential for keeping hair healthy and straight.
- Avoid Shampooing and Tying Hair for 3 DaysAllow hair to adapt to its new shape. Avoid tying, clipping, or shampooing for at least 3 days after the process.
- Use Special Care ProductsInvest in shampoos, conditioners, and hair masks formulated for smoothed or straightened hair. These products are usually sulfate-free and rich in moisturizers.
- Regularly Use Hair Mask or VitaminOnce a week, use a hair mask to provide extra nourishment. You can also use hair serum or vitamins daily to protect from heat and maintain moisture.
- Protect from Excessive HeatIf you must use hot styling tools, always apply heat protectant products first.
Trouble or Doubts? Don’t Hesitate to Visit SalwaSalon.com!
Performing a smoothing retouch yourself indeed requires precision and in-depth understanding. If you feel unsure, or if your previous smoothing results were unsatisfactory, do not take the risk. We at SalwaSalon.com are ready to assist you with professional smoothing retouch services performed by experienced experts.
We have special formulations and the latest techniques to ensure your hair is perfectly straight, healthy, and free from damage. Schedule a free consultation with us to get a hair analysis and the best recommendations. Get your dream hair without worry!


