Complete Tutorial: Beautiful Ombre Hair at Home with Salon-Level Results!

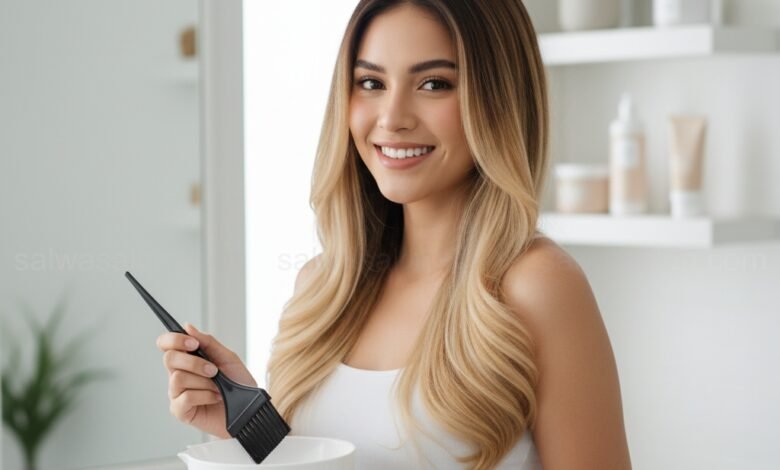
Dyeing ombre hair at home is a fantastic way to refresh your look with a modern and effortless touch. Although it may seem complicated, with the right guidance and thorough preparation, you can create smooth and stunning color gradients yourself. Let’s make your dream ombre hair a reality!
This tutorial will guide you step-by-step, from color selection to post-dyeing care, ensuring you get maximum results just like from a salon. Remember, the key is patience and meticulousness.
Crucial Preparation Before Starting Ombre
- Perform a Mandatory Allergy and Strand Test!
Safety is the top priority. Before applying dye to your entire hair, perform an allergy test on the inside skin of your arm (elbow) 48 hours in advance. This is to ensure no allergic reactions occur. In addition, we highly recommend a strand test. Take a small, hidden strand of hair, apply the dye, and observe how the color reacts and how long it takes to achieve the desired result. This will be your valuable guide for the entire process. - Choose the Right Color Combination for You
Color selection is key. The best ombre has harmonious gradation. Consider your natural hair color and your skin tone. For beginners, we recommend choosing two to three shades lighter than your base hair color for a natural result. If you want a bolder look, you can experiment with higher contrast.- Natural & Smooth: Light brown to honey blonde, dark brown to caramel.
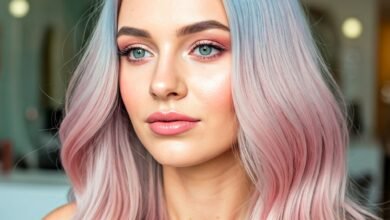
- Bold & Modern: Black to grey, dark brown to platinum blonde, or even a touch of bright colors like purple or red on the ends.
Choose high-quality hair dye products from trusted brands. For bleaching (if necessary), select a developer with the appropriate volume (Vol. 20 is usually safe for beginners, Vol. 30 for brighter results but requires extra caution).
- Prepare Complete Tools and Materials
Make sure all tools are within reach before you start:- Ombre hair dye kit (including bleach and toner if needed)
- Non-metallic bowl and applicator brush
- Protective gloves (often included in the kit)
- Hair clips/hair ties for sectioning
- Old towel or old clothes to protect your attire
- Fine-tooth comb and tail comb (for sectioning hair)
- Large mirror and hand mirror (to see the back)
- Timer or clock
- Petroleum jelly (to protect skin)
- Aluminum foil or plastic wrap (optional, for isolation)
- Shampoo and conditioner specifically for color-treated hair
- Condition Your Hair Well
Do not shampoo on the day you plan to dye! It’s best to shampoo 1-2 days prior so that natural oils on your scalp and hair can provide extra protection from chemicals. Make sure your hair is completely dry before application. Comb your hair until it’s tangle-free.
Steps to Dye Ombre Hair at Home
- Step 1: Protect Yourself and Your Workspace
Wear old clothes or an old towel that you don’t mind getting stained. Ensure your workspace floor is covered with newspaper or plastic. Apply petroleum jelly along your hairline, ears, and nape of your neck to protect your skin from dye stains. Don’t forget to wear the gloves provided in the kit. - Step 2: Hair Sectioning for Precise Ombre
Neat hair sectioning will greatly influence the final result. You can choose the appropriate sectioning method:- Low Ponytail Method: Gather your hair into one or two low ponytails at the back or side of your head. Determine where you want the ombre effect to start (usually around ear or chin level). This is the easiest method for beginners.
- Vertical Method: Divide your hair into four to six vertical sections. Take one section and clip the rest. This provides better control and a more defined result.
For the most natural result, start applying bleach/dye around the mid-length of your hair or slightly below your chin, then work your way down to the ends.
- Step 3: Initial Bleach or Dye Application
If you want an ombre color that is lighter than your natural hair color, you will need to bleach it first. Mix the bleach powder and developer according to the instructions on the packaging. Using an applicator brush, begin to apply the bleach mixture evenly to the sections of hair you have chosen.- Smooth Blending Technique: Start from the ends of the hair, then work your way upwards. Use light sweeping motions (feathering) at the transition line to avoid a harsh gradient.
- Don’t Get Too Close to the Roots: Make sure you don’t apply bleach too close to the hair roots, as this will eliminate the ombre effect.
- Even Application: Ensure every strand of hair you want to ombre is well-coated with bleach. You can use aluminum foil to wrap each bleached section; this helps the bleaching process be faster and more even.
- Step 4: Monitor the Process and Waiting Time
Follow the recommended waiting time on the product packaging, but never leave your hair unattended. Check the color progress every 5-10 minutes by scraping off a small amount of bleach from a tiny hair strand. Once the desired lightness is achieved (remember your strand test results!), rinse immediately.Important Warning: Do not leave bleach on your hair for too long as it can cause severe damage. If you notice signs of damage such as hair becoming brittle or feeling excessively hot, rinse immediately. - Step 5: Rinsing and Toner Application (If Needed)
After the waiting time is complete and the color is achieved, rinse your hair thoroughly to remove all bleach residue. Use cool or lukewarm water. Afterwards, apply a generous amount of conditioner or a special hair mask for freshly bleached hair.If the bleaching result tends to be yellowish or orange (brassiness), this is the time to use purple toner or blue toner to neutralize the color. Follow the toner’s instructions carefully and do not leave it on for too long. - Step 6: Final Color Application (If Not Bleach-Only Ombre)
If you want to dye the bleached sections with another color (e.g., from light blonde to pastel), dry your hair first. Then, apply your chosen dye to the bleached sections of hair. Repeat the blending application steps and waiting time as you did during bleaching. - Step 7: Post-Color Care and Styling
After all processes are complete, rinse your hair thoroughly, apply conditioner again, then dry and style your hair. Behold your masterpiece! To keep your ombre color beautiful and your hair healthy, use shampoo and conditioner specifically for color-treated hair. We at SalwaSalon.com also recommend using hair masks regularly.
Pro Tips for Perfect and Long-Lasting Ombre
Product Recommendations for Color-Treated Hair
Invest in sulfate-free hair care products specifically for color-treated hair. These products will help maintain color pigments, preventing them from fading quickly, and keeping your hair nourished. Look for products with UV filters to protect the color from sun exposure.
Avoid Washing Your Hair Too Often
Washing your hair too frequently can accelerate color fading. Try to shampoo 2-3 times a week and use dry shampoo between washes to refresh your hair.
Utilize Hair Masks Regularly
Color-treated hair, especially bleached hair, is prone to dryness. Regularly use hair masks at least once a week to maintain your hair’s moisture, strength, and shine.
When to Seek Professional Help?
Although dyeing ombre at home can be very satisfying, there are times when you might need a professional touch. If you find it difficult to achieve color gradation, want a drastic color change, or experience problems such as hair damage from bleaching, don’t hesitate to contact us at SalwaSalon.com. Our team of experts is ready to help fix or perfect your ombre look with the best techniques and products.
We also offer in-depth consultations to help you choose the color that best suits your skin tone and lifestyle. We believe every hair has the potential to shine, and we are ready to make it happen for you!
Conclusion
Dyeing ombre hair at home indeed requires courage and meticulousness, but the results can be very satisfying. By following each step in this guide and applying the tips we’ve provided, you will successfully create a beautiful and professional-looking ombre.
Remember, beauty is a journey. Don’t be afraid to experiment, and most importantly, enjoy the process. If you’re looking for more inspiration or want to deepen your knowledge about hair care, explore our other articles at SalwaSalon.com. We are always here to support your beauty journey.


