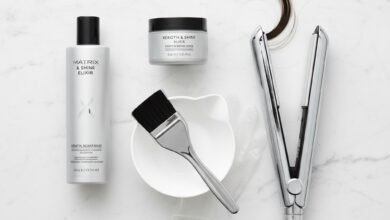
Complete Hair Bleaching Guide: Achieve Your Dream Color Safely (Step-by-Step)
Level, Teknik, dan Inspirasi Warna Rambut
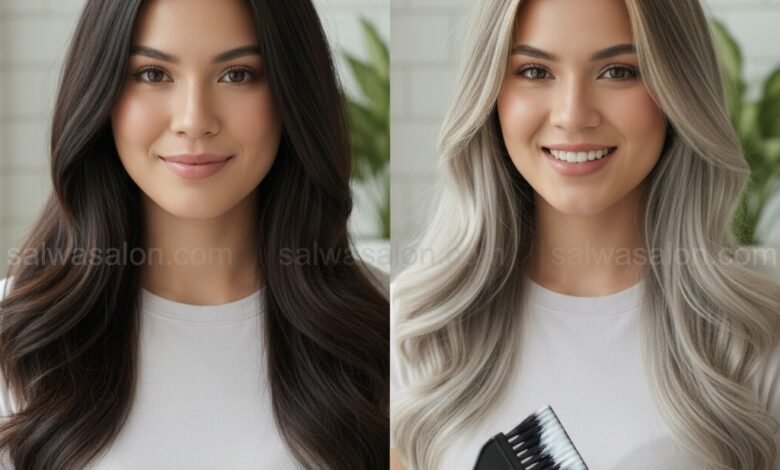
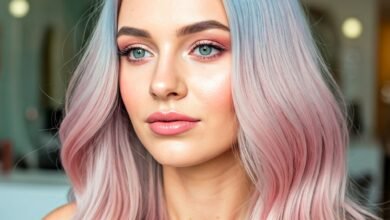
The dream of having hair with bright colors like platinum blonde, electric blue, or pastel pink is now easier to achieve thanks to the bleaching process. However, to achieve stunning results without damaging your beautiful tresses, proper understanding and meticulous steps are required. This article will be your complete guide, taking you through every stage of hair bleaching, from preparation to aftercare, so you can safely and confidently get your dream color.
At SalwaSalon.com, we believe that everyone deserves to feel beautiful with healthy hair. Therefore, we will guide you like a coach, providing practical and in-depth tips we’ve gathered from our long experience in the beauty world. Ready for a new hair color adventure?
1. Crucial Preparation: Understanding Your Hair Condition
Before embarking on your bleaching adventure, the most important thing is to ensure your hair is ready for the process. Bleaching is a powerful chemical procedure, and if your hair is not in prime condition, the risk of damage will be very high. Follow these assessment steps:
Healthy Hair Vs. Damaged Hair: Know the Difference
- Healthy Hair: Elastic when pulled, not easily broken, naturally shiny, feels smooth, and shows no signs of severe split ends.
- Damaged Hair: Dry, dull, brittle, breaks easily, overly elastic (like a rubber band when wet), and has many split ends. If your hair falls into this category, postpone bleaching and focus on intensive treatment to restore its health first.
Avoid Bleaching If:
- Your hair has been recently dyed a permanent dark color within the last 6 months.
- Your hair is brittle, thin, or very dry.
- Your scalp has irritation, wounds, or certain skin conditions.
If you are unsure about your hair’s condition, we highly recommend consulting with our experts at SalwaSalon.com. A professional assessment will ensure your safety and the best results.
2. Understanding Developer: The Key to Your Bleaching Strength
Developer, or peroxide, is the magical liquid mixed with bleaching powder to open the hair cuticles and lift color pigments. Choosing the right developer is a crucial step that will determine how light your hair can be bleached and how safe the process will be. Here’s your guide:
- Developer Volume 10 (3% Peroxide): For a Gentle Touch
This is the gentlest developer, ideal if you only want to lift your hair color by 1 level or perform toning on already bleached hair. Suitable for beginners or if your hair is very fragile. - Developer Volume 20 (6% Peroxide): The Popular Choice
Volume 20 is the most common and versatile developer. It can lift color up to 2 levels and is suitable for first-time bleaching applications on healthy hair. We often recommend this for beginners because its risks are lower compared to higher volumes, yet it remains effective. - Developer Volume 30 (9% Peroxide): For Significant Lightening
If you want to lift your hair color by up to 3 levels, Volume 30 is your choice. It’s stronger and works faster. However, you must be extra careful. Do not use it on sensitive scalps or already damaged hair, and always monitor the process closely. - Developer Volume 40 (12% Peroxide): Caution, Experts Only!
This is the strongest and fastest developer. It can lift color by 4 levels or more. SEVERE WARNING: We STRONGLY advise against using Volume 40 developer for at-home bleaching. The risk of severe damage, hair breakage, and even scalp burns is very high. It should only be used by experienced professional hairstylists for specific cases.
3. Determining Your Dream Bleaching Level: A Color Guide (Step-by-Step)
After understanding developers, it’s time to envision your final result! The lightness of bleached hair is measured in levels, from 1 (darkest) to 10 (perfectly light). Each level has a different underlying tone. Let’s learn about them to help you make a decision:
- Level 1-6: Basis for Warm Tones
At this level, your hair will be in the range of dark brown to reddish-brown. If you want a result that isn’t too light and is more natural, or just want a base for colors like burgundy or light brown, this level is ideal. It suits all skin tones and carries minimal risk of damage. - Level 6/7: Warm Orange Blonde
Your hair will reach light brown to blonde with distinct orange or yellowish undertones. This is an important transition stage. If your goal is pure blonde, you may need to repeat the bleaching process or use a toner to neutralize these orange pigments. Many bright colors like vibrant red or copper will look stunning at this level. - Level 8: Elegant Honey Blonde
At this level, hair will appear golden or honey blonde. Orange pigments have begun to diminish, replaced by softer yellow. To reach level 8, it usually takes 1-2 bleaching sessions, depending on your hair’s base color. Colors like caramel or honey blonde will look perfect. - Level 9: Light Blonde with a Touch of Gold
You will achieve a light blonde with beautiful golden undertones. This is a great level for bright and pastel base colors like intense purple, pink, or navy blue. Darker skin tones will look very captivating with blonde at this level. Intensive aftercare is already becoming very necessary. - Level 10: Lightest Blonde
This is the highest level; your hair will become very light blonde, almost yellowish-white. This is the perfect canvas for soft pastel colors, cool grays, or even pure white. Reaching level 10 usually requires several bleaching sessions and demands very healthy hair from the start. This is where post-bleaching care becomes absolutely crucial! - Platinum Blonde / Icy Blonde: Cool & Stunning
To achieve this color, your hair must have already reached level 10, then be toned with a purple or blue toner to eliminate any remaining yellow undertones and create a cool, almost silvery blonde effect. This is a high-fashion look that requires a high commitment to aftercare. - True White: Pure Snow-Like White
The ultimate level of bleaching! Hair is completely clean white with no yellow pigment whatsoever. The process is very intensive, often requiring strong purple/silver toners and several careful bleaching applications. You must be ready for a very disciplined care routine, including regular use of silver shampoo. - Ash Blonde / Grey Hair: Modern & Edgy
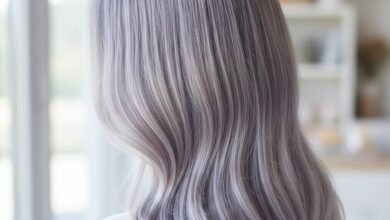
Similar to platinum, but with a more concentrated ash toner to create a modern gray effect. Very suitable for olive skin tones who want an edgy yet elegant look. Hair at level 9-10 is required as the base.
Remember, every hair is unique! Bleaching results may vary. Always consult with our experts if you are unsure about achieving a specific level.
4. Bleaching Techniques for Beginners: Achieve Optimal Results at Home
Now that you know what you want, let’s discuss how to do it. Remember, patience is key!
- Prepare Tools and Workspace
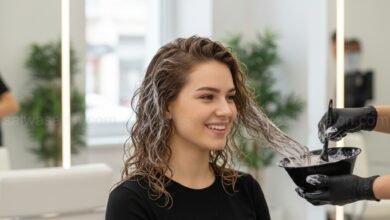
Gather a non-metallic bowl, application brush, gloves, comb, hair clips, scale (for precise ratios), old towels, and protective clothing. Ensure the workspace is well-ventilated. - Mix Bleaching Powder and Developer
Follow the ratio indicated on the bleaching product packaging. Typically 1:1 or 1:2 (1 part bleaching powder to 1 or 2 parts developer). Mix until it forms a thick, homogeneous paste, not too liquid or too solid. - Perform a Strand Test
This is a MANDATORY step. Take a small section of hair from a hidden area (e.g., behind the ear). Apply the bleaching mixture and monitor the time it takes to reach your desired level of lightness. This will be your guide for applying to the rest of your hair. - Divide Hair into Sections
For even application, divide your hair into 4-6 sections using clips. Start from the back of the head moving towards the front, as the back of the hair tends to lighten slower. - Apply the Bleaching Mixture
Apply the bleaching mixture quickly and evenly, starting from the ends, then to the mid-lengths, and finally to the roots (if you’re bleaching your entire head). Hair roots lighten faster due to scalp heat, so apply there last. Ensure all hair strands are thoroughly covered. - Monitor the Process and Time
Watch your hair every 5-10 minutes. Do not leave it on longer than the maximum time indicated on the product packaging or the time you determined from your strand test. If you notice your hair becoming brittle, elastic, or emitting a strange odor, rinse immediately! - Rinse and Wash Thoroughly
After the appropriate time, rinse your hair with cool water until all bleaching residue is gone. Follow with a shampoo and conditioner formulated for color-treated or bleached hair.
5. Post-Bleaching Aftercare: Maintaining Your Hair’s Beauty and Health
The bleaching process is transformative, but also intensive. Your hair will require extra love and attention afterward. Proper aftercare is key to maintaining the beauty, strength, and vibrancy of your bleached hair in the long term.
- Use Shampoo and Conditioner Specifically for Color-Treated/Bleached Hair
Avoid products with harsh sulfates, as they can strip color and dry out hair. Choose a product line specially formulated for color-treated or bleached hair, which typically contains moisturizing ingredients and proteins for repair. - Hair Mask Twice a Week
Bleached hair is very prone to dryness and brittleness. Perform deep conditioning with a hair mask at least 1-2 times a week. Look for masks rich in natural moisturizers like shea butter, argan oil, or keratin to restore your hair’s moisture and strength. - The Importance of Leave-In Conditioner or Hair Oil
After shampooing, apply a leave-in conditioner or hair oil (like Sunsilk Hair Vitamin 3-in-1 Mist, which is lightweight and convenient) to provide extra protection, maintain moisture, and make hair easier to manage without feeling greasy. This also helps protect against environmental damage. - Use Toner or Purple/Silver Shampoo to Maintain Tone
For blonde hair, especially level 8 and above, yellow or orange pigments can reappear over time. Use purple shampoo (to neutralize yellow) or silver shampoo (for an ash effect) 1-2 times a week to keep your hair color as desired and prevent brassiness. - Minimize the Use of Heat Styling Tools
Excessive heat is the main enemy of bleached hair. As much as possible, air dry your hair or use a low heat setting on your hairdryer. If you must use straighteners or curling irons, always apply a heat protectant spray first. - Protect Hair from Sunlight and Chlorine
UV rays can fade color and dry out hair. Use a hat or UV protection products when active outdoors. If swimming, wet your hair with clean water first and apply a leave-in conditioner to create a barrier against chlorine.
6. When to Go to a Salon? Recognizing Your Limits for the Best Results
While this guide is designed to help you, there are times when entrusting it to the experts is the best option. At SalwaSalon.com, we always emphasize the importance of your hair’s safety and health. When should you consider visiting our salon?
- Your Hair is Damaged or Has Been Previously Dyed Dark
If your hair is already fragile, has split ends, or was previously dyed a permanent dark color, the bleaching process can be very complex. Professional hairstylists can assess your hair’s condition and recommend pre-bleaching treatments or special techniques. - You Desire a Drastic Color Change (e.g., from Black to Platinum)
Achieving a very light blonde level from dark hair requires several careful bleaching sessions and knowledge of how to gradually lift pigments without damaging the hair. - You Are Hesitant or Have Never Bleached Your Own Hair Before
If this is your first experience and you feel unsure about the steps, don’t take risks. A hairstylist will ensure even application, proper timing, and safe developer selection. - For Color Correction
If your bleaching results are uneven, too yellow/orange, or you want to change the color of already bleached hair, color correction is a complicated process and requires professional expertise.
Don’t hesitate to contact SalwaSalon.com for a FREE consultation. We are ready to help you achieve your dream hair color safely and with perfect results!
Conclusion: Dare to Express, Prioritize Hair Health
Hair bleaching can indeed be a gateway to a bold and expressive look. With this practical step-by-step guide, you now have a deeper understanding of the bleaching process, from preparation, developer selection, color level determination, to crucial post-bleaching care.
Remember, the key to successful bleaching is not just about how light your hair can get, but also how healthy and beautiful your hair remains. Give it extra attention, be patient, and don’t be afraid to seek professional help if you feel it’s necessary. At SalwaSalon.com, we always support every step you take towards the best version of yourself!
